Have you ever wondered how to photograph waterfalls so that you get that silky smooth water effect? It’s not as hard as you think! Here are a few simple tips:
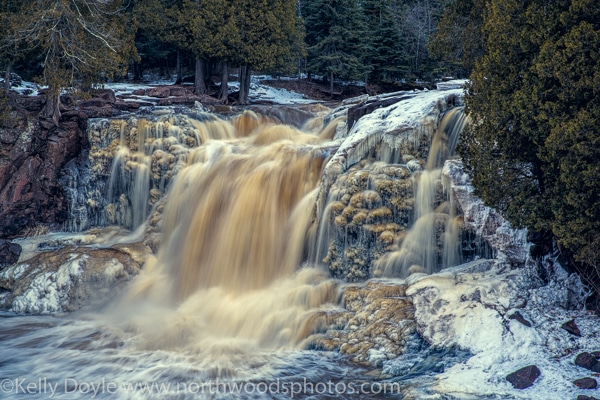
Gooseberry Falls State Park, North Shore of Lake Superior in Minnesota
Gear Needed to Photograph Waterfalls
If you want to get that silky smooth water flowing effect, you’re going to need some gear:
- Sturdy Tripod
- Neutral Density Filters
- Possibly a Polarizing Filter depending on your focal length and the scene you’re shooting.
- Camera that can accept filters and can be set to manual to do long exposures.
- Backpack or other means of getting your gear to the location.
- Possibly ice cleats for your boots/shoes if you’re shooting in winter, like this particular shot.
Ideal Conditions to Photograph Waterfalls
The best weather conditions for shooting waterfalls is a calm overcast day. The rocks and surrounding areas are typically much darker than the whitewater that flows through the river channel, so sunny days can really blow out your whites and highlights. You also want calm winds since you’ll be doing long exposures and you don’t want the camera getting buffeted by the breeze. And of course, you want to shoot during a time of year when there is adequate water flowing, otherwise you’ll be left with a trickle (if anything) coming over the drop. Typically spring snow melt or after a rainfall are good times.
How to Photograph Waterfalls
Once you’ve scouted a location and managed to get there, choose your composition and set up your tripod. Determine what aperture you want and keep it constant. Since you’re on a tripod, make sure your image stabilization is turned off. If you’re going after the silky smooth water look, you’ll want a relatively slow shutter speed, at least a few seconds long. Use a remote control to trip the shutter, or set a self timer so that you don’t move the camera when you press the shutter. I typically bracket my shots 2 stops of light apart until I’ve covered the dynamic range in the scene by keeping the aperture constant and changing ISO or shutter speed. You’ll be underexposing some shots to get details in the whitewater while overexposing others to get details in the surrounding rocks.
Post Processing
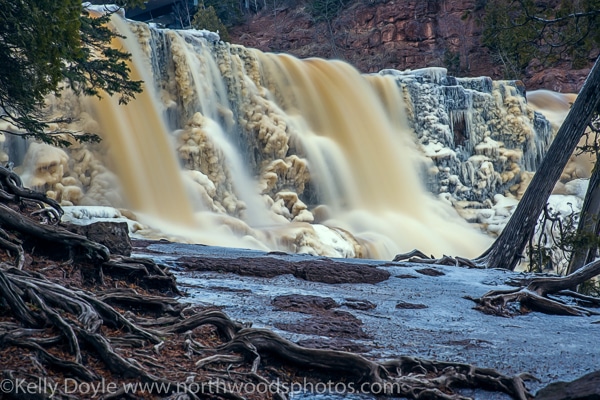
This particular shot was actually four different exposures that were then blended together using HDR (High Dynamic Range) software in Adobe Lightroom. There are other HDR programs out there, but Lightroom or Photoshop are the ones that I use. Once you’ve got your HDR, process to taste as usual.
Four shots blended to create a HDR image.
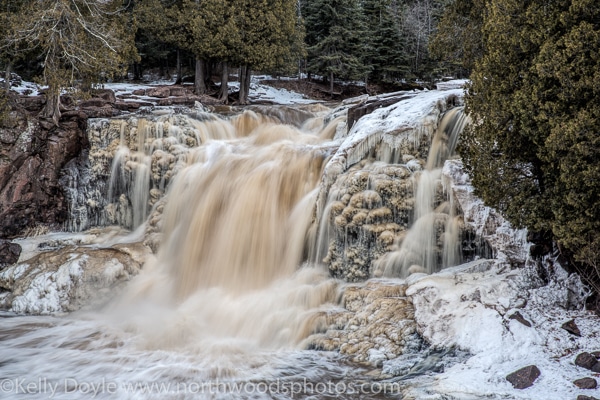
This is what my image looked like after blending the four exposures together, but I wanted to add some color to give it a little more pizzazz. There are lots of ways to do that, but the fastest and easiest for me is to use Topaz Restyle plug-in. That program has more presets than I’ve counted, and you also have complete control to customize those presets and even change blending modes. It’s also non-destructive, so play around with as many different edits as you like. The options are endless! For this image, I used “Blue Gray Shade” and adjusted opacity as well as a few other tweaks to get my final result:
Final Result after adjusting color palette in Topaz Restyle
I hope you learned a few helpful tips – now go out and give it a try yourself!